How I Built an AWS Dynamic, BGP Based, Highly-Available Site-to-Site VPN

As the title suggests, I was able to setup and implement a Site to Site VPN from an AWS Virtual Private Cloud (VPC) to a simulated on-premise environment utilizing the Border Gateway protocol (BGP) to configure the routes.
This article details how I was able to complete this. From a high level, this is the process that was followed:
- Stage 1 - I provisioned the environment
- Stage 2 - I Setup the TGW (transit gateway) VPN Attachments
- Stage 3 - I configured the IPSec Tunnel
- Stage 4 - I setup BGP Routing and tested
Stage 1 - Provision the Environment
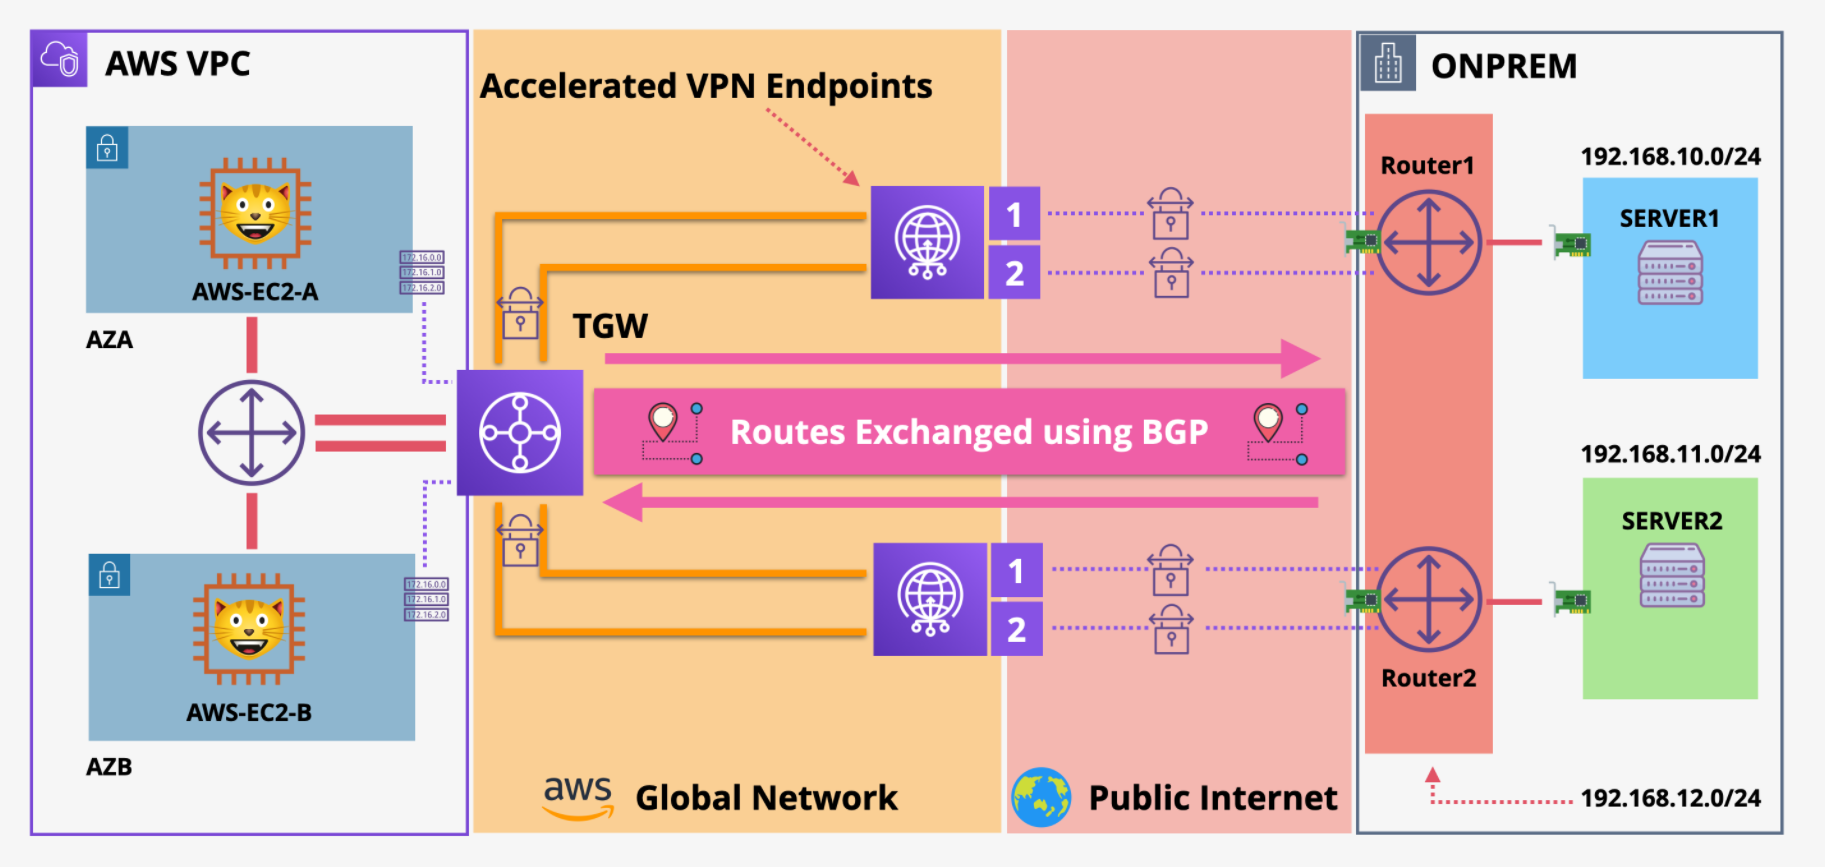
The goal in this demo is to connect an AWS VPC to a simulated on-premise environment using a secure and highly available VPN connection.
I started by deploying two cloud formation templates supplied by @Adrian Cantrill to setup the base infrastructure.
The first cloud formation template represents the AWS infrastructure side and includes the following:
- two subnets, two EC2 instances, a TGW, a VPC attachment, and a default route pointing at the TGW
The second cloud formation template simulates the on-premise environment using AWS resources:
- one public subnet, two private subnets. The public subnet has two Ubuntu + strongSwan + Free VPN endpoints.
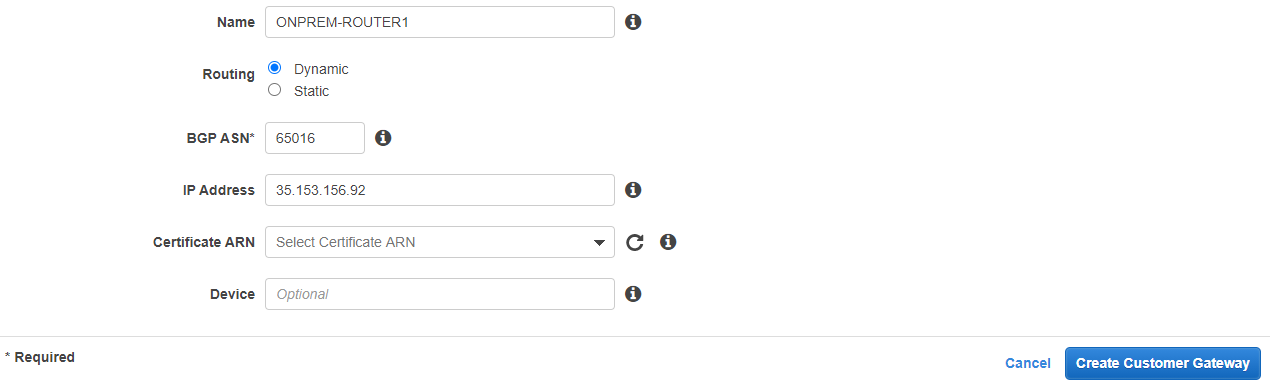
Then, I setup two customer gateways to simulate two on-premise routers. Having two customer gateways allows for the creation of a highly available environment. In the real world these gateways would likely be in two separate locations to ensure availability.

These routers were configured to use Dynamic routing, which allows the use of the dynamic BGP routing protocol. I assigned a private Autonomous System Number, and assigned public IPs to these routers.
At this stage there was no connectivity between the On-prem and AWS network. I was able to confirm this by running a ping test:

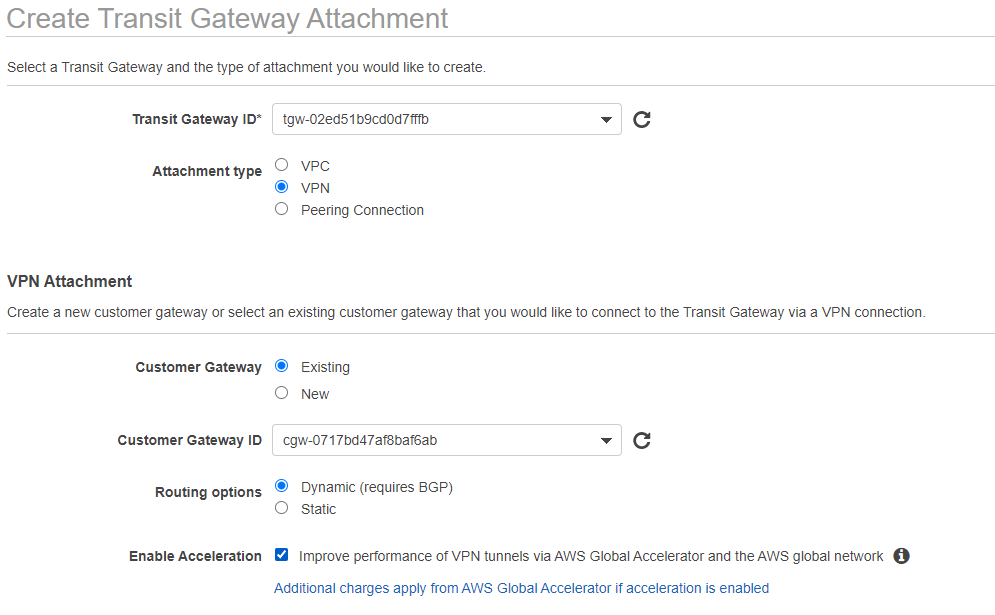
Stage 2 - Setup the TGW (transit gateway) VPN Attachments
With the environment in place, I moved onto creating the transit gateway VPN attachments. These attachments essentially create a secure VPN connection from the transit gateway to the customer gateway.
In our on-prem environment there are two customer gateways. I navigated to the AWS VPC console and setup two transit gateway attachments, one for each gateway.
For each attachment, I selected the transit gateway which was created in the "AWS" cloud formation template. I also chose dynamic routing (for BGP) and allowed "Enable Acceleration" to speed up our routing traffic.
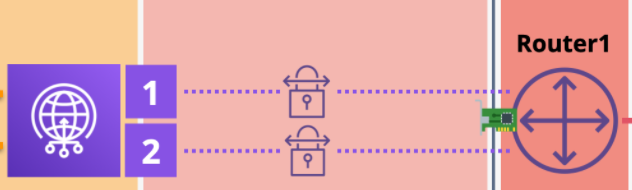
Stage 3 - Configure the IPSec Tunnel
At this stage, I was able to set up multiple IPSec tunnels. The IPSec tunnels span from the customer gateway to the VPN endpoints. These tunnels encrypt and secure the data as it traverses the public internet.
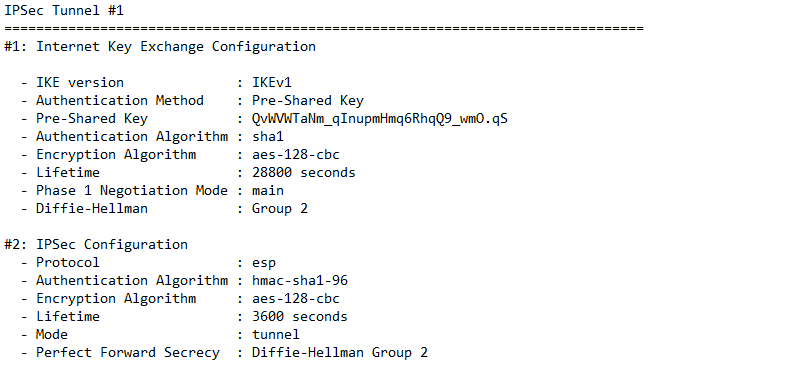
To setup the IPSec tunnels, I first gathered a bit of information. I pulled the router IP's and I also downloaded the VPN config files from the VPC console. These files contain several bits of information.
They contain some of the following items:
- The pre-shared keys for the tunnels
- The outside IPs which are used to configure the main IP sec tunnel
- The inside IPs which are used to setup the data flow within the IP sec tunnel
In this demo we used EC2 instances on the simulated on-premise side to act as routers, and utilized strongSwan to act as our IPSsec VPN.
To configure the IPsec tunnel, I had to edit a few files that strongSwan uses. I edited the following files:
- ipsec.conf: This file configures the tunnels using the outside IP addresses of the customer gateway and the AWS endpoint
- ipsec.secrets: This file contains the outside IP addresses and the pre-shared keys
- ipsec-vti.sh: This script brings up the IPSec tunnels and contains the inside IP addresses
With strongSwan configured one is able to see that the IPSec shows as "up" in the AWS console.

The tunnel, however, shows as down. This is because BGP is not configured yet. Due to the BGP/routing not being configured, traffic from the AWS servers cannot successfully reach the on-prem servers at this stage:

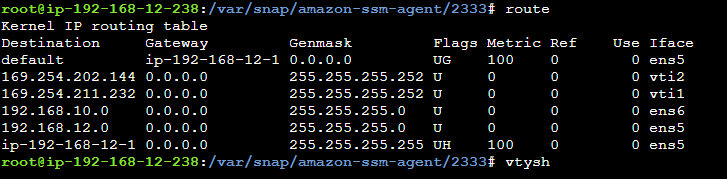
Stage 4 - Setup BGP routing
To allow traffic from the AWS servers to reach on-prem and vise versa, I needed to configure the customer gateways to use BGP.
In this specific demo I installed FRR on the customer gateways to allow BGP capabilities.

For each of the tunnels I then added AWS as the neighboring route on the customer gateway.
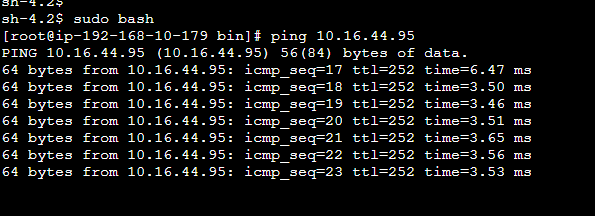
Success !
The on-prem and AWS servers are now able to successfully communicate using our Dynamic, BGP Based, Highly-Available Site-to-Site VPN!
This architecture was designed to be highly available. There are multiple VPN endpoints, Customer Gateways, and EC2 instances. I also configured IPSec tunnels to encrypt our data in transit and ensure security.
Closing thoughts
Thank you to @Adrian Cantrill for creating this demo!
I appreciate everyone who made it this far down!
- Check out my site: https://www.dsearles.com/
- Feel free to connect with me on LinkedIn: https://www.linkedin.com/in/donovansearles/